
This page contains the instructions for an all-in-one installation of CloudStack/Vines in Ubuntu Server 20.04 LTS. It is for testing or trial purpose only.
sudo apt-get update
sudo apt-get upgrade
sudo apt-get install bridge-utils openssh-server openntpd genisoimage python3-pip mysql-server nfs-kernel-server qemu-kvm libvirt-daemon-system libvirt-clients/etc/netplan/00-installer-config.yaml file to /etc/netplan/original-00-installer-config.yaml to save it as a backup.
sudo mv /etc/netplan/00-installer-config.yaml /etc/netplan/original-00-installer-config.yaml/etc/netplan/00-installer-config.yaml. Add the content below to the file.
network:
    version: 2
    renderer: networkd
    ethernets:
        enp1s0:
            dhcp4: no
            dhcp6: no

    bridges:
        cloudbr0:
            interfaces: [enp1s0]
            dhcp4: no
            dhcp6: no
            addresses: [192.168.122.10/24]
            gateway4: 192.168.122.1
            nameservers:
                addresses: [8.8.8.8, 8.8.4.4]
Apply the changes.
sudo netplan --debbug applyIP="192.168.122.10"
HOSTNAME=$(hostname -f)
sudo sed -i -e "s/^127.0.1.1.*/$IP $HOSTNAME/" /etc/hostssudo sed -i "s/#PermitRootLogin.*/PermitRootLogin yes/" /etc/ssh/sshd_configwget http://www.inf.ufpr.br/jwvflauzino/vines/binary/cloudstack-deb.tar.gztar -zxvf cloudstack-deb.tar.gzsudo apt install ./cloudstack-common_4.*
sudo apt install ./cloudstack-management_4.*sudo mysql -u root -p<root-password> with your actual root password.
ALTER USER 'root'@'localhost' IDENTIFIED WITH mysql_native_password BY '<root-password>';
exit;/etc/mysql/conf.d/cloudstack.cnf. Add the content below to the file.
innodb_rollback_on_timeout=1
innodb_lock_wait_timeout=600
max_connections=350
server-id=master-01
log-bin=mysql-bin
binlog-format = 'ROW'
Restart MySQL.
sudo service mysql restartsudo cloudstack-setup-databases cloud:<root-password>@localhost --deploy-as=root:<root-password>/export/primary and /export/secondary directories for the NFS share.
sudo mkdir -p /export/primary /export/secondarysudo echo "/export *(rw,async,no_root_squash,no_subtree_check)" | sudo tee -a /etc/exports/export directory.
sudo exportfs -asudo service nfs-kernel-server restartsudo mkdir -p /mnt/primary /mnt/secondarysudo mkdir -p /var/cloudstack-vnfm/vnfp_repositorysudo chmod 777 -R /var/cloudstack-vnfm/vnfp_repository/etc/fstab file in order to make the mount automatic on system reboot.
sudo echo "192.168.122.10:/export/primary /mnt/primary nfs rsize=8192,wsize=8192,timeo=14,intr,vers=3,noauto 0 2" | sudo tee -a /etc/fstab
sudo echo "192.168.122.10:/export/secondary /mnt/secondary nfs rsize=8192,wsize=8192,timeo=14,intr,vers=3,noauto 0 2" | sudo tee -a /etc/fstabsudo mount /mnt/primary
sudo mount /mnt/secondarysudo apt install ./cloudstack-agent_4.*sudo sed -i 's/#vnc_listen = "0.0.0.0"/vnc_listen = "0.0.0.0"/' /etc/libvirt/qemu.conf
sudo systemctl restart libvirtd.servicesudo /usr/share/cloudstack-common/scripts/storage/secondary/cloud-install-sys-tmplt -m /mnt/secondary -u http://cloudstack.apt-get.eu/systemvm/4.18/systemvmtemplate-4.18.0-kvm.qcow2.bz2 -h kvm -Fsudo umount /mnt/primary
sudo umount /mnt/secondarysudo reboot192.168.122.10 with the IP of your CloudStack server if need be.
http://192.168.122.10:8080/client
The installation is completed!
You can now access the CloudStack UI (see the Step 9 - Log Into Apache CloudStack) and configure it. In doing so, you must configure your CloudStack Management Server to manage all the resources that were prepared in the previous steps.
If you need more information about it, we recommend see the CloudStack documentation.
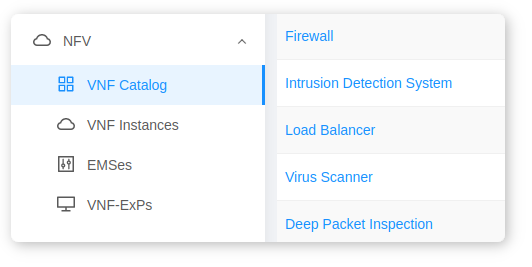
Vines features can now be accessed via CloudStack UI! You can manage the VNF Catalog (add, edit, and delete VNF Packages), deploy VNF instances, start/stop network functions (i.e., the network software running inside VMs), etc.
To learn how to use the Vines features, see the Vines Administration Guide. You can also see more about how the CloudStack REST API works in the Apache CloudStack API Documentation.